Mine turned out alright but not perfect like theirs. First they tell you to cut a piece of fabric (heavy duty like felt or wool) the size of the runner you want. I went out after work on Friday and because it is the Christmas season everywhere was a ZOO! I had lost all patience for people in general and just wanted to get home so I told the lady at the counter to just cut 2 yards of red felt, thinking it should be plenty. It's a little short...
Then it says about 4 inches up from the runner's bottom and three inches in from the edge (well you know mine isn't large enough for this), cut a 1/2 inch pair of vertical cuts three inches away from the first set. Make another pair of vertical cuts three inches away from the first set of slits. Thread a 1/2 inch velvet ribbon through the slits. Punch a hold through the fabric to insert the end of the ribbon. Tie bells onto the end of the ribbon for a jingly finish.
Okay, so I know where I went wrong. First, I didn't have the directions with me when shopping and just the idea of what was needed (felt, velvet ribbon and bells). It's important to take note the measurements of the ribbon because well it's imporatant as you will soon see. So I couldn't exactly follow their instructions because well first the felt was too short, my ribbon was not the right kind and my bells were slightly too small to push the ribbon through without destroying the ribbon. I decided to make do with what I had anyway and I would creat a version similar but not perfect.
Here are some pictures of my very imperfect runner for a very perfectly imperfect girl...


 Well now that I have botched that what else can I get these hands of destruction on!?!?! Maybe some wreaths I plan to give to some co-workers for Christmas. I joke, but really if I were terrible at everything then I wouldn't still be attempting this type of stuff. I always ruin something when I do not take my time and think that I know better than anyone else. I've never been the best at reading instructions...ha ha ha.
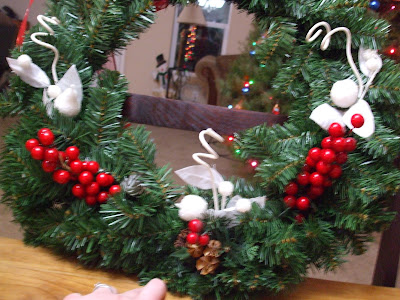
These wreaths are actually really easy as long as you have a glue gun. First I grab liked colored items and place them on the premade wreath form to get an idea of what I want it to look like when it is complete. I tend to stick to simple designs and leave room for the owner to either add a ribbon or other items that will work with their Christmas themes. Although sometimes I do go crazy and put items everywhere I didn't do that here.


 Once you have pre-placed the items where you want them to be then it's just dobs of hot glue and pushing it into place. If the item has a wire stem or just a wire at all it is best to try to wrap it around the metal ring on the wreath but if not, hot glue should work just fine-at least it always has for me in the past. Here is another one...
I just fluff them a bit and they are ready to hang. I hope everyone enjoyed their weekend like I did. This imperfect (ha ha ha) girl is truly content with how she spent the weekend. Now I have to get back to real life....you know, laundry, dishes and vaccumming-the inlaws are coming! Yikes! :)


No comments:
Post a Comment
Thanks for stopping by! Drop me a line...I love comments. XOXO ~Cass